
Want to easily find diamonds and other valuable resources in Minecraft without the hassle of installing mods or loaders like Fabric or Forge? The perfect solution is an X-Ray resource pack, which works on any game version, including the latest 1.21. This guide will show you how to set it up in less than a minute.
TL;DR: Download the X-Ray Ultimate
.zipfile, go toOptions->Resource Packs->Open Pack Folderin-game, drop the file in, and activate the pack in the menu.Compatibility: 1.8.9+ - 1.21+ • Type: Resource Pack • Platforms: Win/Linux/macOS
What is an X-Ray Resource Pack?
Unlike a mod, an X-Ray resource pack doesn’t add new game mechanics. Instead, it simply changes the textures of most common blocks to be transparent. This makes blocks like stone, dirt, and gravel invisible, allowing you to easily spot caves, mob spawners, and all valuable ores like diamonds, netherite, iron, and gold. It’s the simplest and safest way to “see through” the world.
Why Use a Texture Pack Instead of a Mod?
- No Mod Installation Needed: You don’t have to install Fabric, Forge, or any extra API libraries. It works on “vanilla” Minecraft.
- Easy to Toggle: You can enable and disable the X-Ray pack directly from the in-game menu at any time.
- Full Compatibility: Resource packs are often forward-compatible with newer game versions, even if they haven’t been officially updated.
Requirements
- Minecraft Java Edition
- That’s it, no mods required!
Quick Start (3 steps)
- Download: The X-Ray Ultimate texture pack
.zipfile (link at the bottom). - Move: Drop the downloaded
.zipfile into theresourcepacksfolder. - Activate: Enable the pack in the in-game menu by moving it to the right-hand column.
Step-by-Step Installation
Step 1 — Download the Resource Pack
Go to the CurseForge page (link provided at the bottom of this guide) and download the X-Ray Ultimate pack.

Make sure to get the version that matches your Minecraft version, although older packs often work on newer releases.

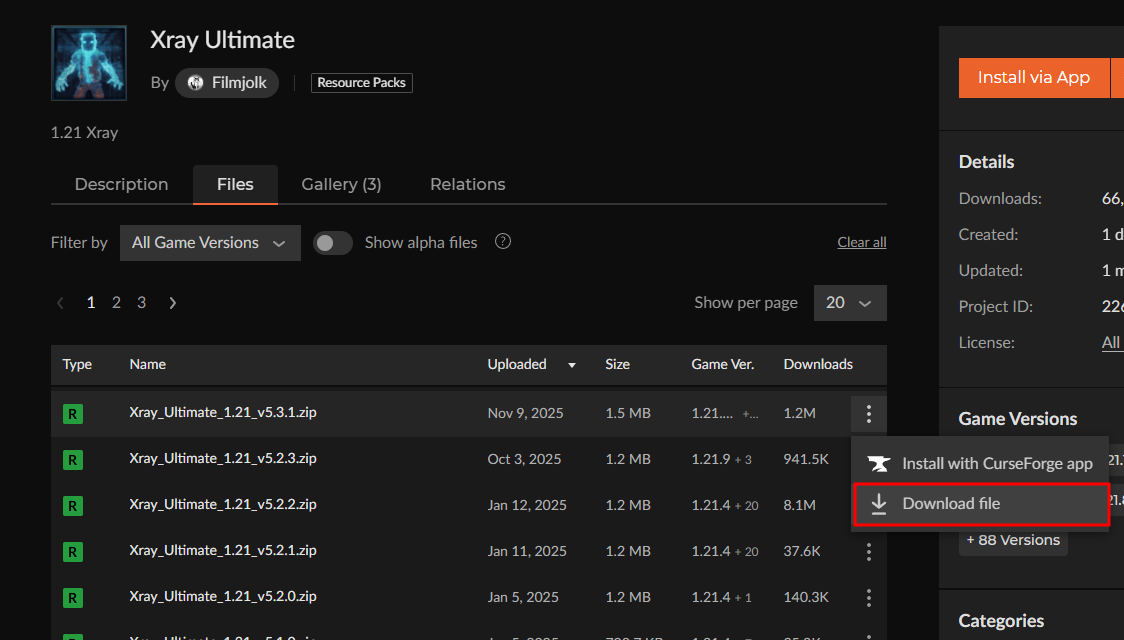
Do not unzip the file!
Step 2 — Open the Resource Pack Folder
- Launch Minecraft.
- From the main menu, click
Options....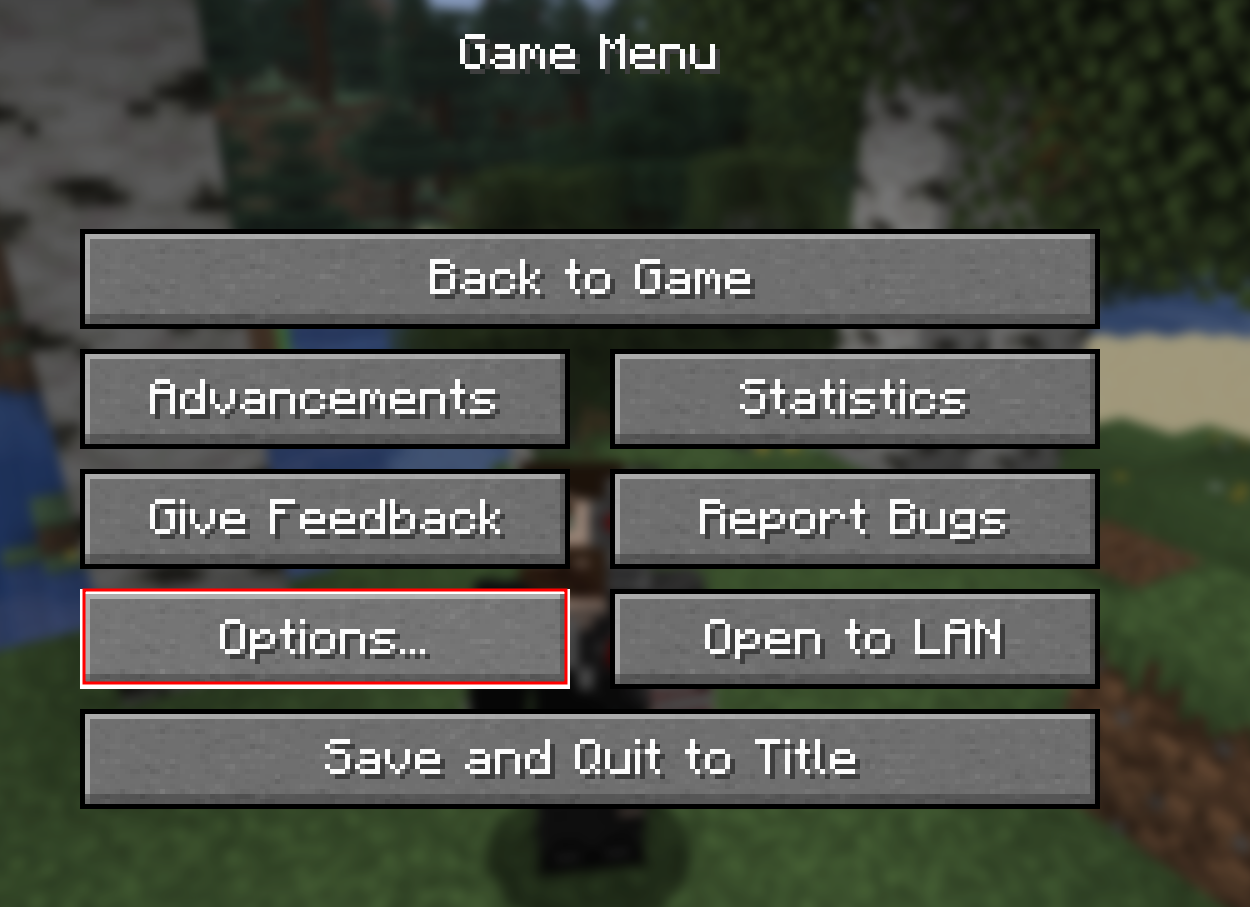
- Next, go to
Resource Packs....
- Click the
Open Pack Folderbutton. A new window will open, showing theresourcepacksfolder.
Step 3 — Install and Activate the X-Ray Pack
- Drag or copy the
.zipfile you downloaded earlier into theresourcepacksfolder that just opened.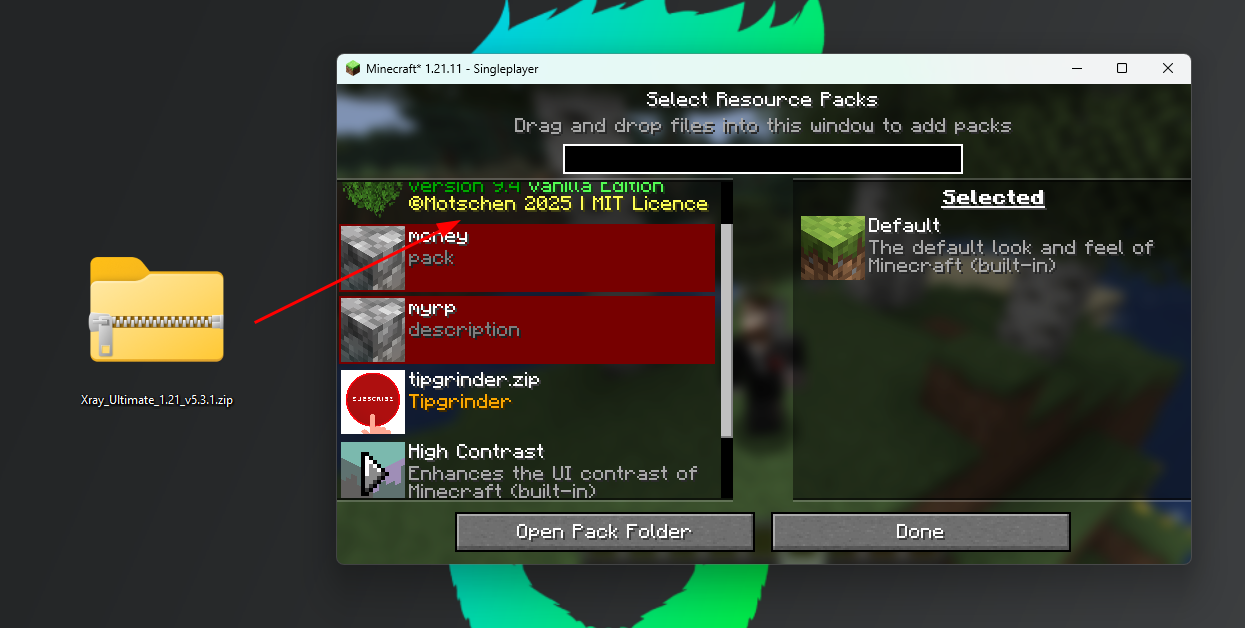
- Return to the game. The X-Ray pack should now appear in the left “Available” column.
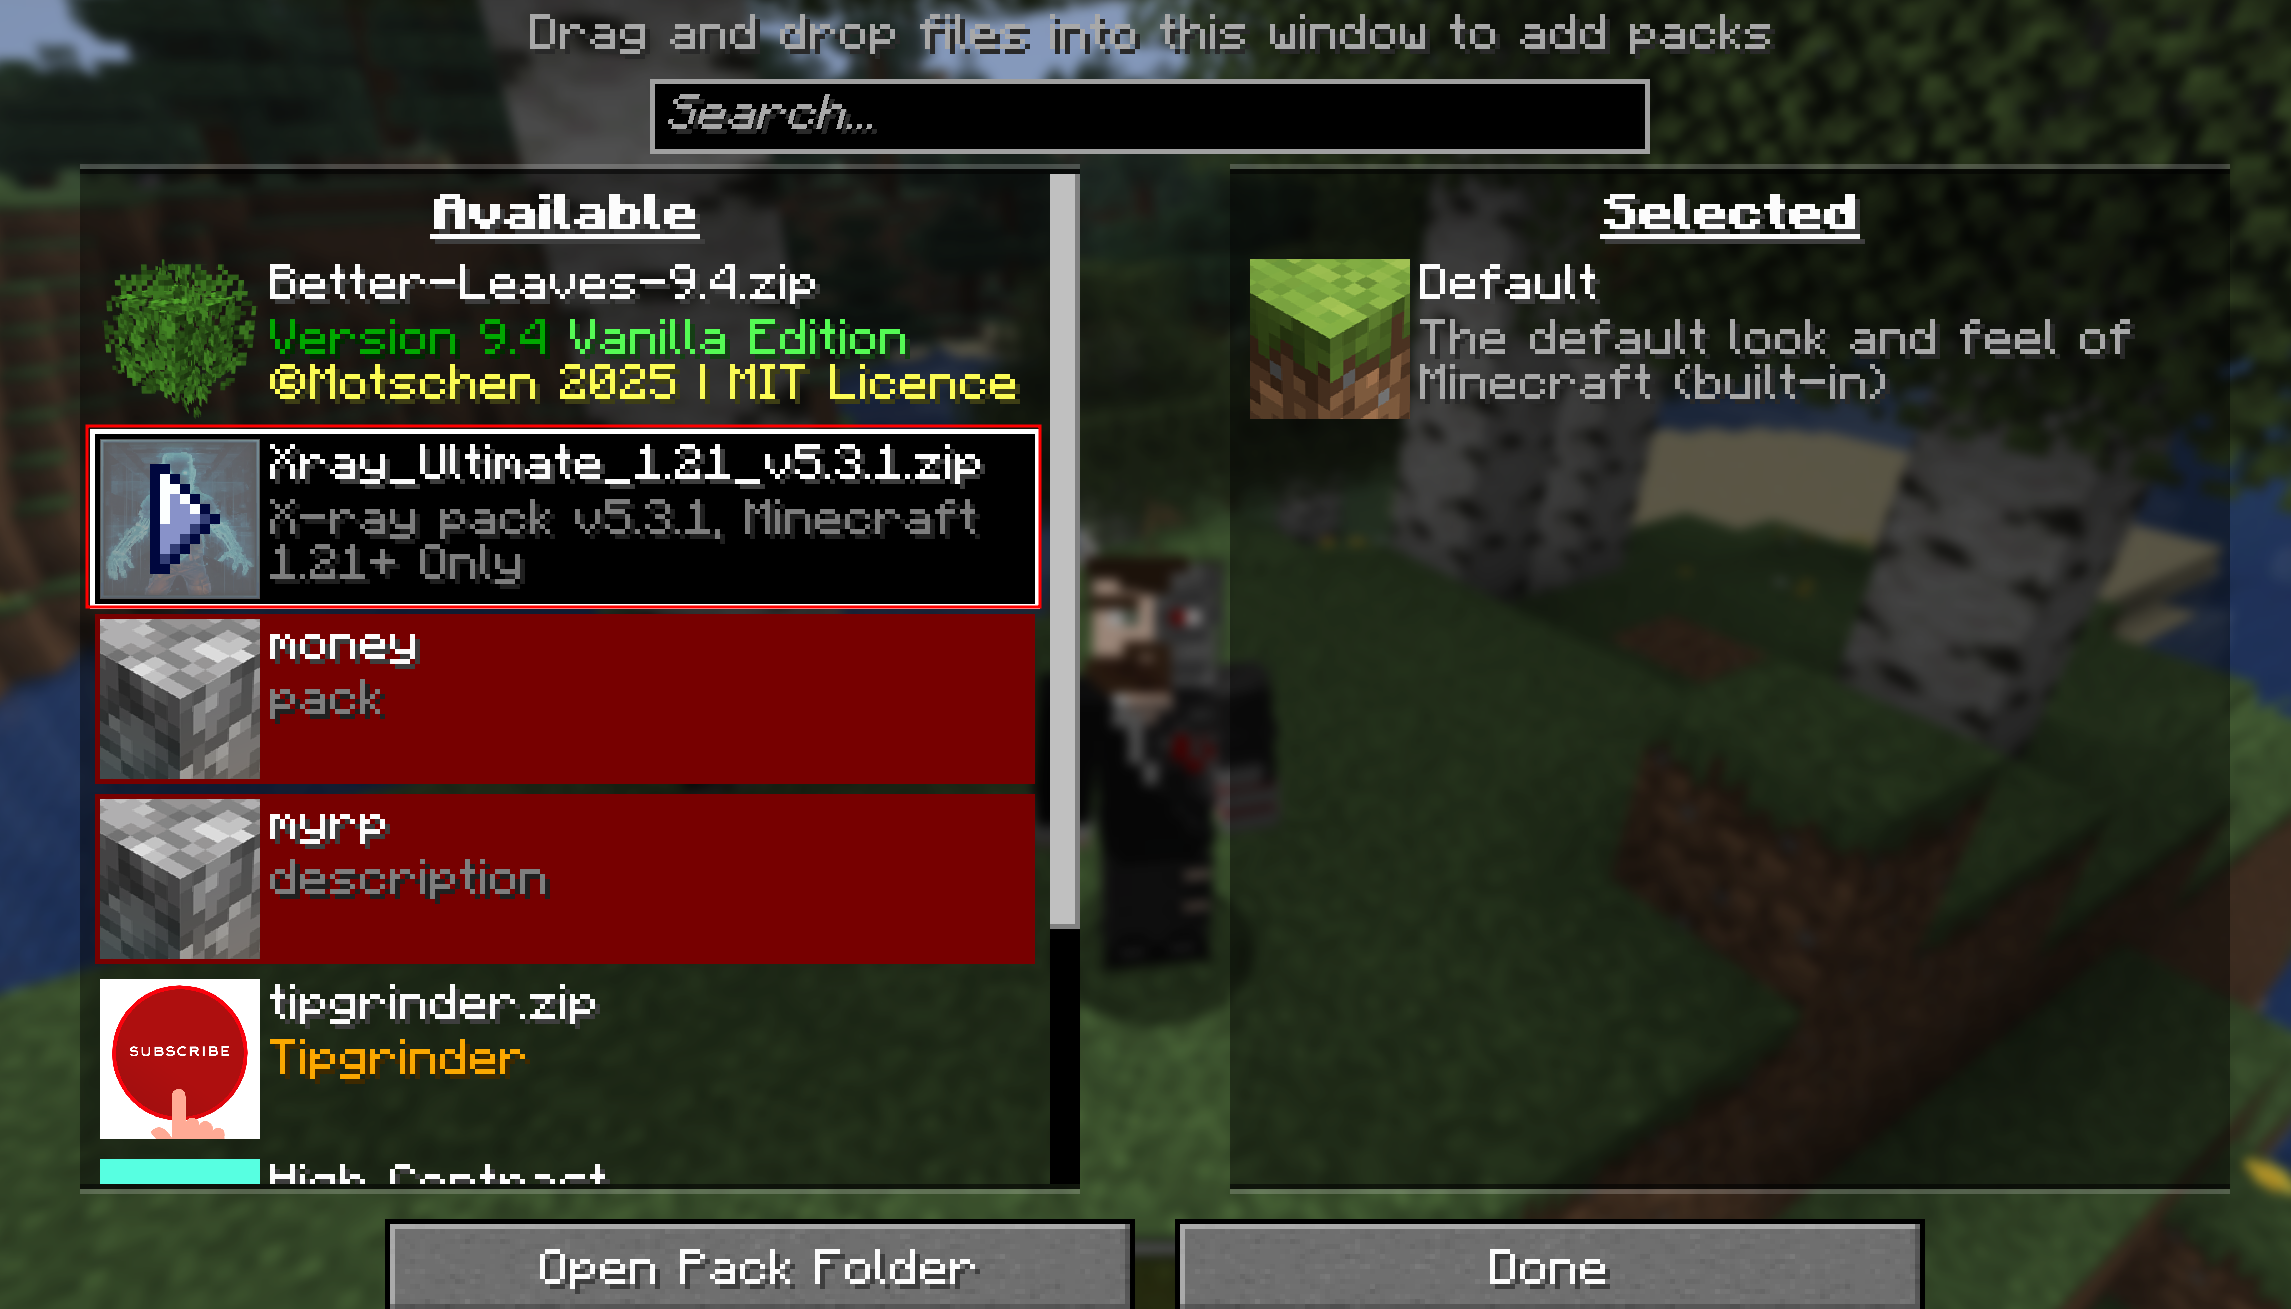
- Hover over the pack’s icon and click the arrow to move it to the right “Selected” column.
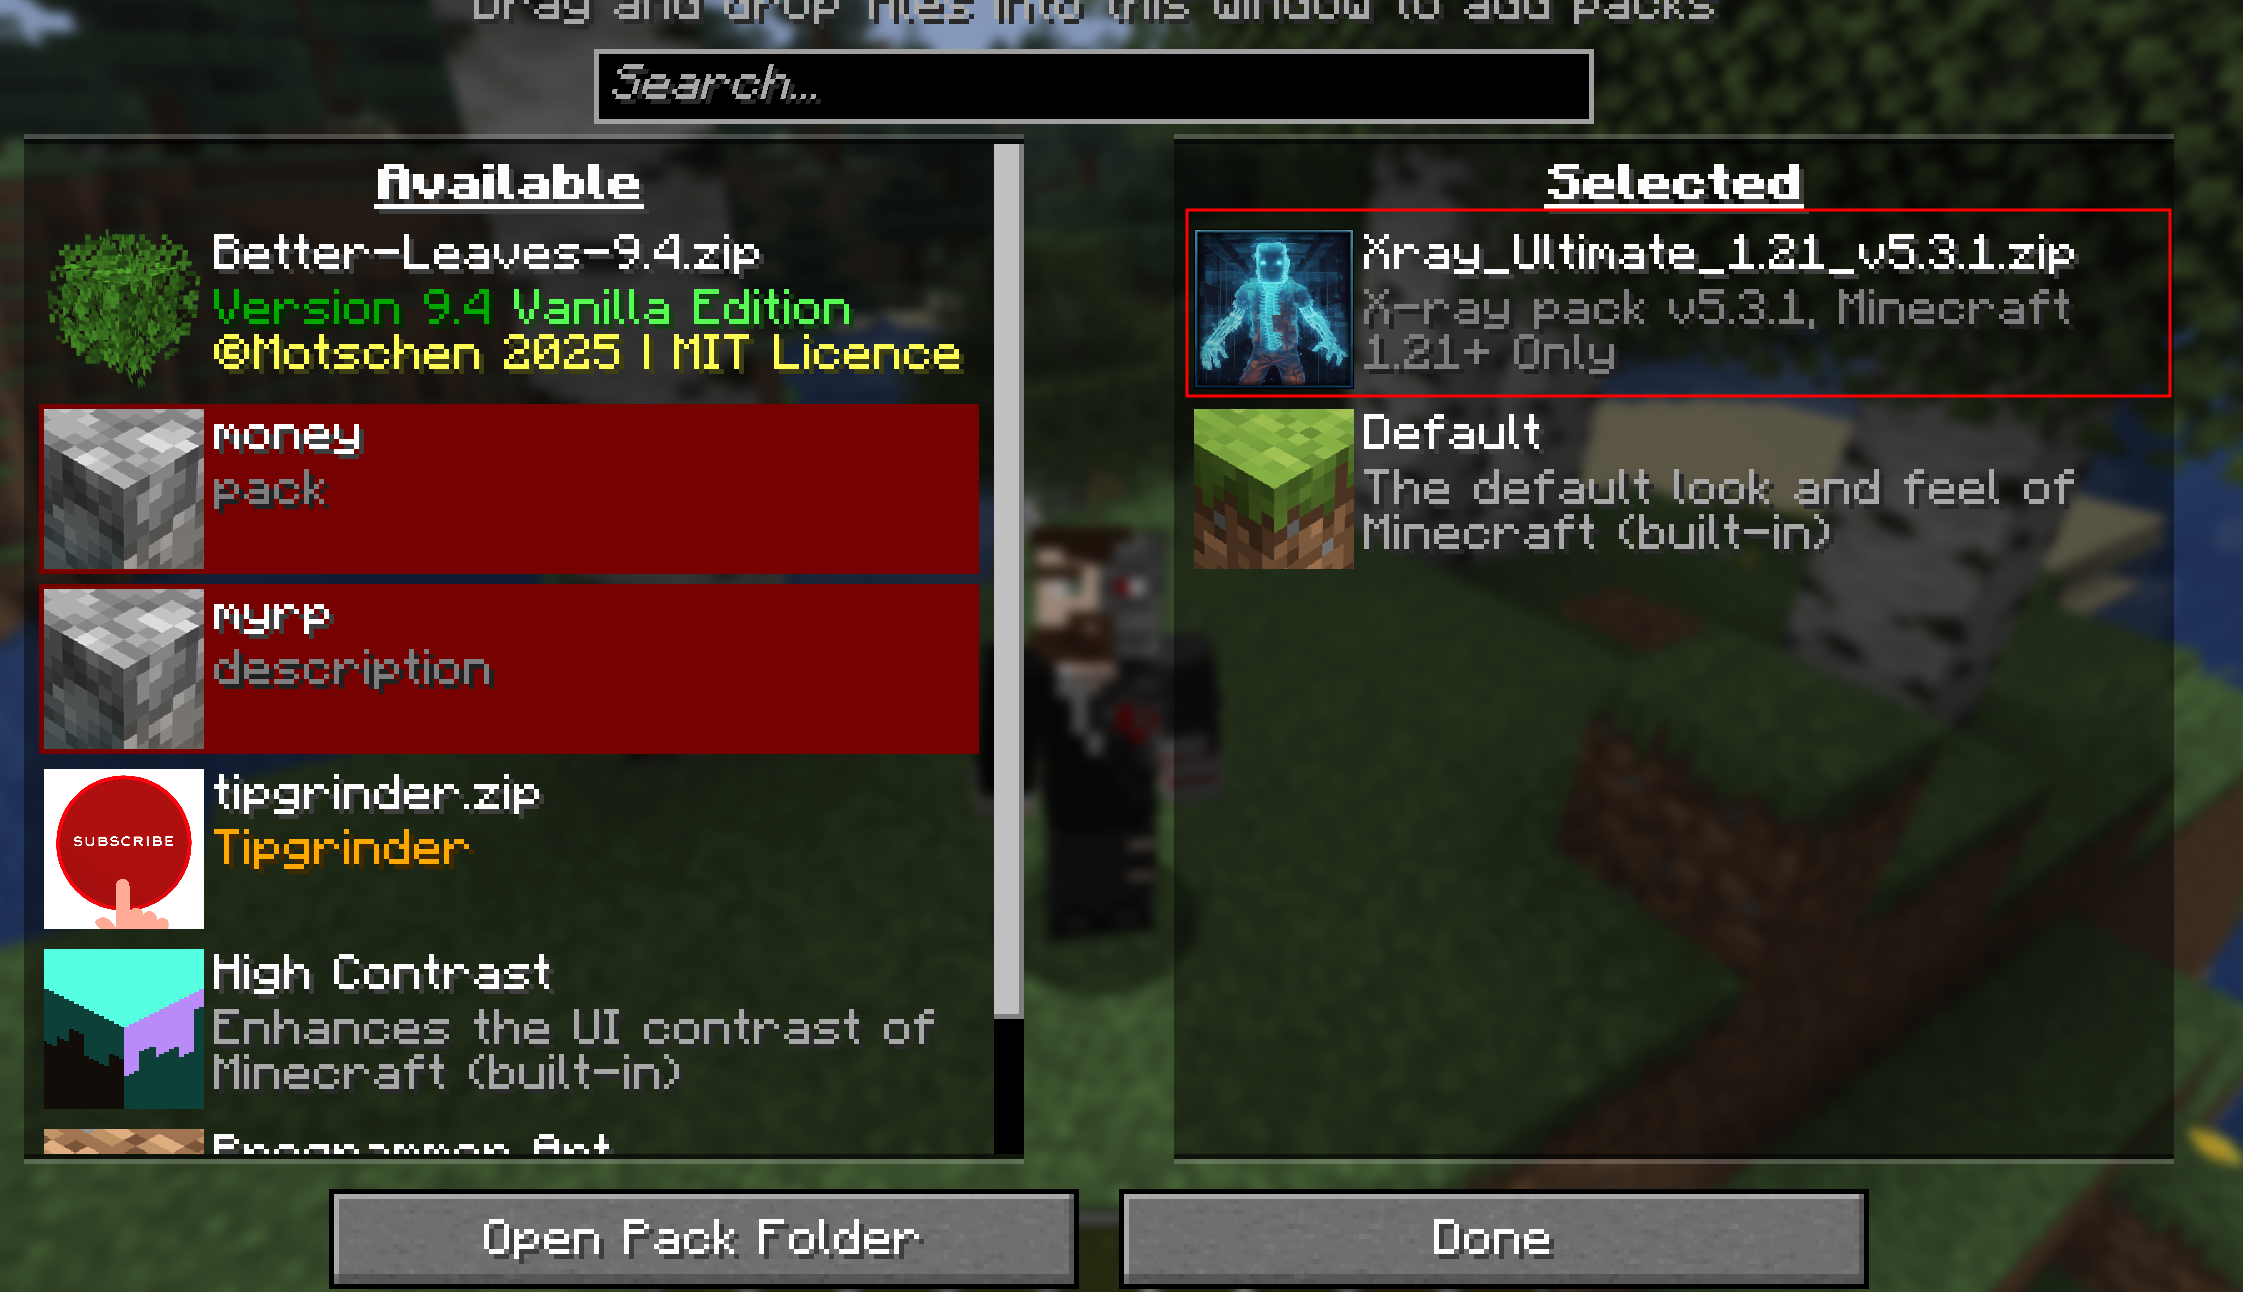
- Click the
Donebutton. The game will freeze for a moment to reload the textures.
That’s it! Enter your world, and the X-Ray effect will be active.

Common Issues & Fixes
- The pack doesn’t appear in the game: Make sure you moved the
.zipfile into theresourcepacksfolder, not its unzipped contents. - The game says the pack is incompatible: You can usually ignore this warning and enable the pack anyway. Minor features might not work, but the core function (transparent blocks) should be active.
- I want to see normally again: To disable X-Ray, just go back to the resource packs menu and move the pack from the right column back to the left.
Uninstallation
To completely remove the pack, simply delete its .zip file from the resourcepacks folder.

Downloads & Links
- Download X-Ray Ultimate — Main recommended pack
- Download Better X-Ray (Alternative) — A second option