
NeoForge is a modern and powerful mod loader for Minecraft, created as a fork of the popular Forge. It allows for easy installation and management of mods, opening up the game to thousands of new possibilities. This guide will show you, step by step, how to install NeoForge and add your first optimization mod – Sodium.
TL;DR (Quick Version)
- Download NeoForge: Go to neoforged.net and download the installer for your Minecraft version.
- Install: Run the installer (
.jarfile) and choose the “Install client” option. - Download a Mod: Get a NeoForge-compatible mod, like Sodium from Modrinth.
- Place the Mod: Put the mod’s
.jarfile into themodsfolder in your main game directory (%appdata%/.minecraft/mods). - Play: Launch the Minecraft Launcher, select the NeoForge installation, and enjoy your mods.
Requirements
- Minecraft: Java Edition: You must own a legal copy of the game.
- Java: Ensure you have Java installed. The Minecraft Launcher usually installs its own version, which is sufficient.
Step 1: Download the NeoForge Installer
Visit the official project website at neoforged.net. Select the Minecraft version you want to play on (in our case, 1.21.8) and click the button to download the installer.
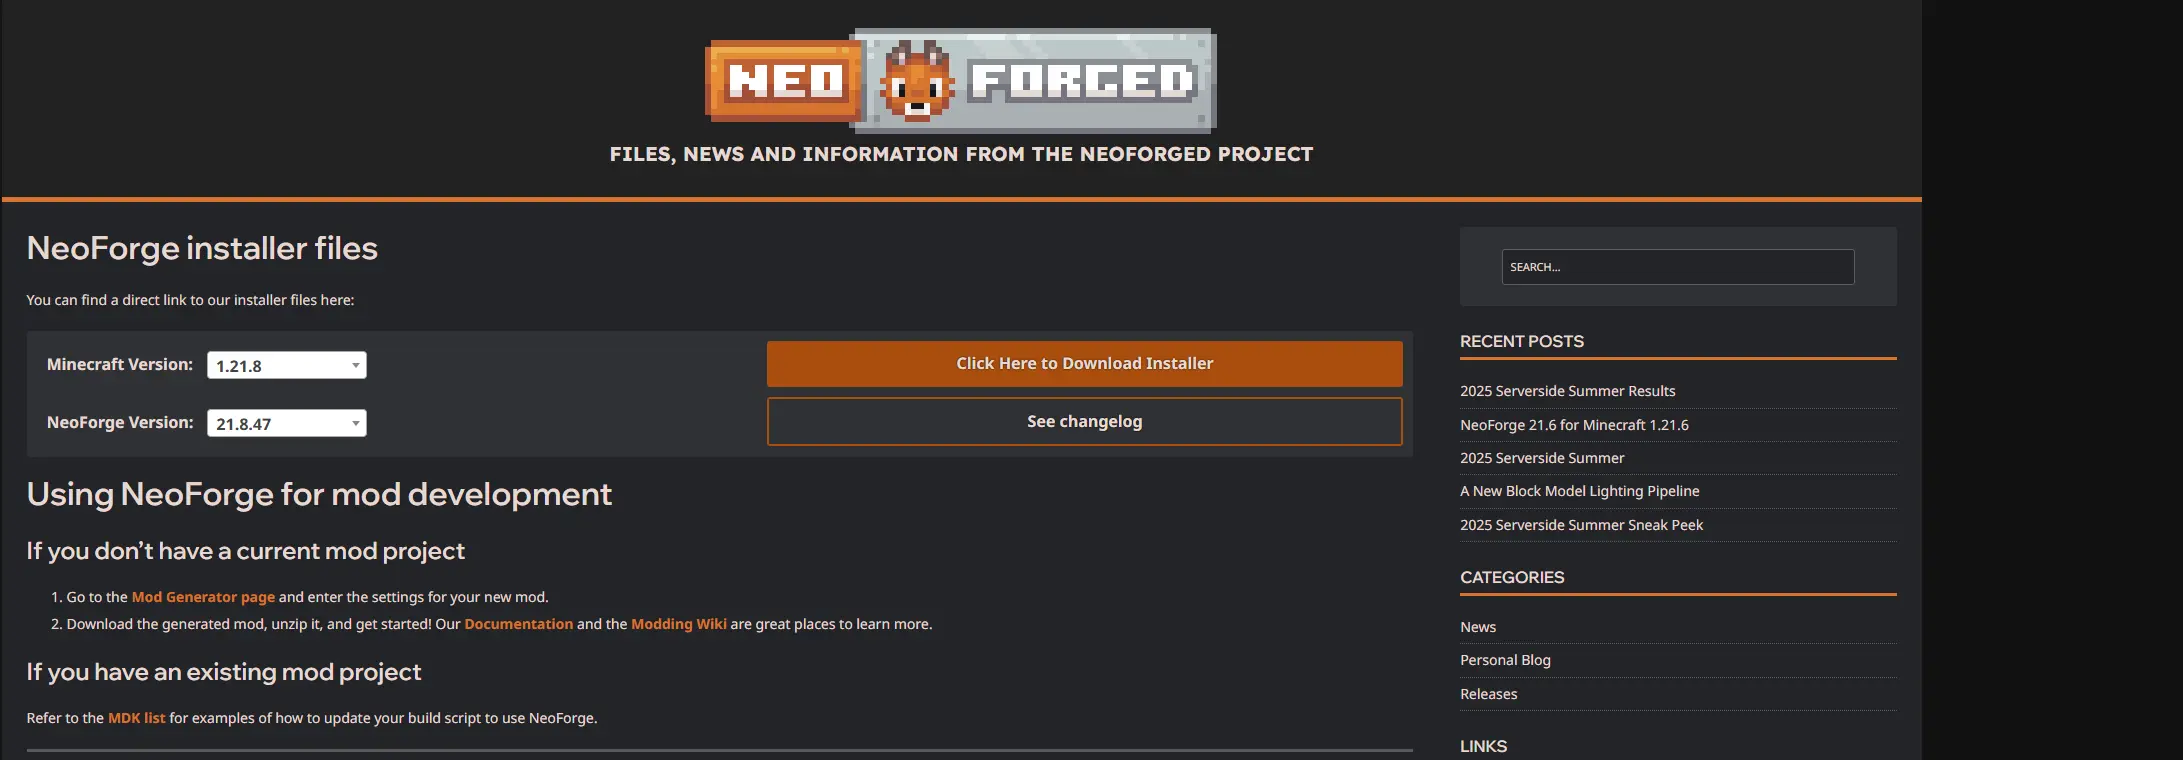
Save the installer file (e.g., neoforge-21.8.47-installer.jar) anywhere on your computer.

Step 2: Install the NeoForge Client
Run the downloaded .jar file by double-clicking it. An installer window will open.
- Make sure the “Install client” option is selected.
- The path to your
.minecraftfolder should be detected automatically. - Click “OK” to begin the installation.
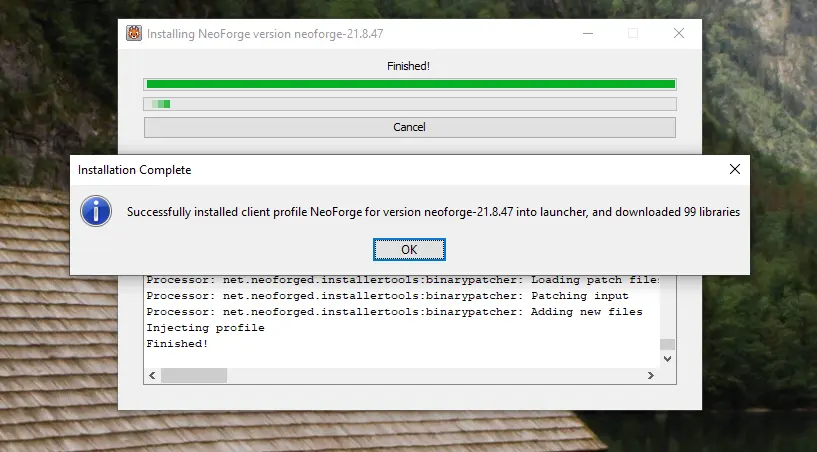
After a moment, a success message will appear.
Step 3: Verify the Installation in the Minecraft Launcher
Open the official Minecraft Launcher. In the bottom-left corner, next to the “PLAY” button, you should see a new installation named “NeoForge.”
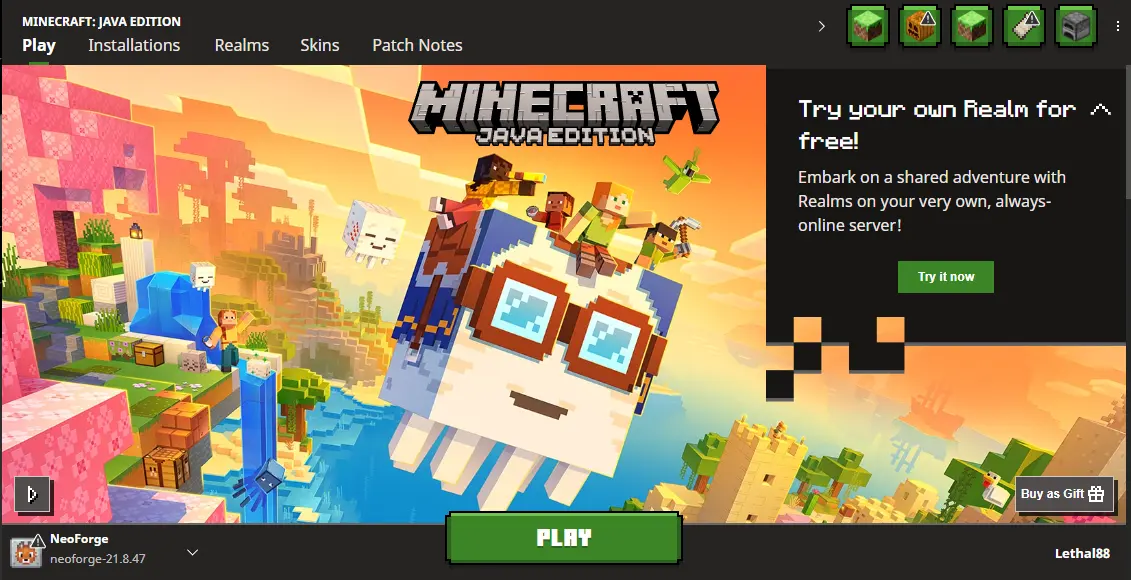
If the profile isn’t visible, go to the “Installations” tab, make sure the “Modded” option is checked, and find it on the list.
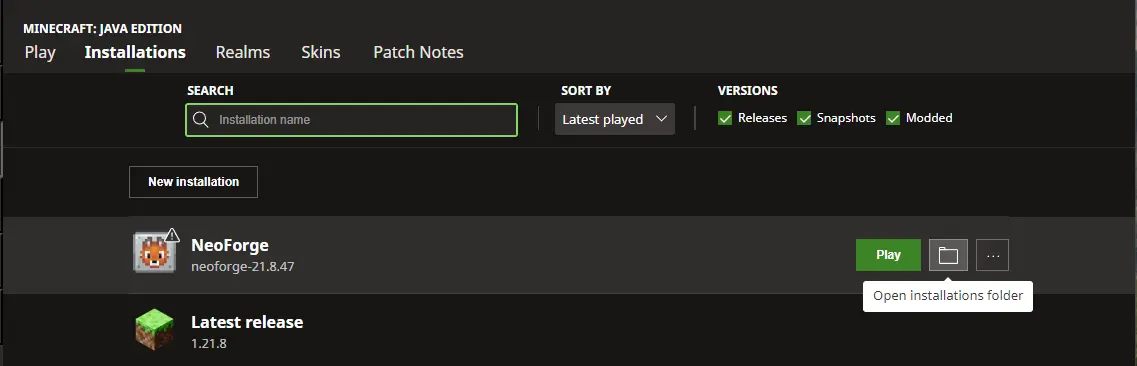
Step 4: Download Your First Mod (Example: Sodium)
NeoForge is ready, now it’s time for mods! As an example, we’ll install Sodium, a popular mod that significantly increases your frames per second (FPS).
- Go to the mod’s page on Modrinth.
- Click “Download” and select a version compatible with your Minecraft and NeoForge as the loader.
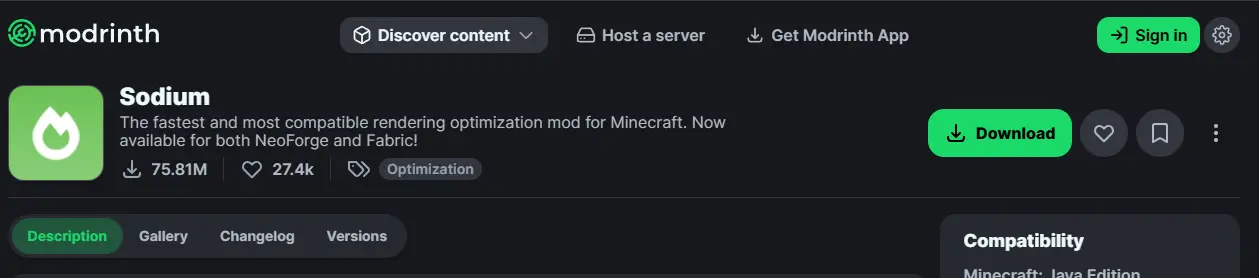
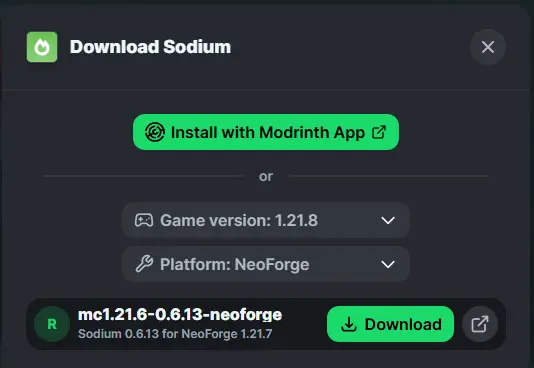
Save the mod’s .jar file to your computer.
Step 5: Add the Mod to the Game
Now you need to place the downloaded mod file into the correct folder.
- Press
Win + Rand type%appdata%/.minecraft/. - Find the folder named
mods. If it doesn’t exist, create it. - Move the Sodium mod’s
.jarfile into themodsfolder.

Step 6: Launch the Game with Mods
Return to the Minecraft Launcher, ensure the NeoForge installation is selected, and click “PLAY”.
After the game loads, you should see information about NeoForge and the number of active mods on the main menu.
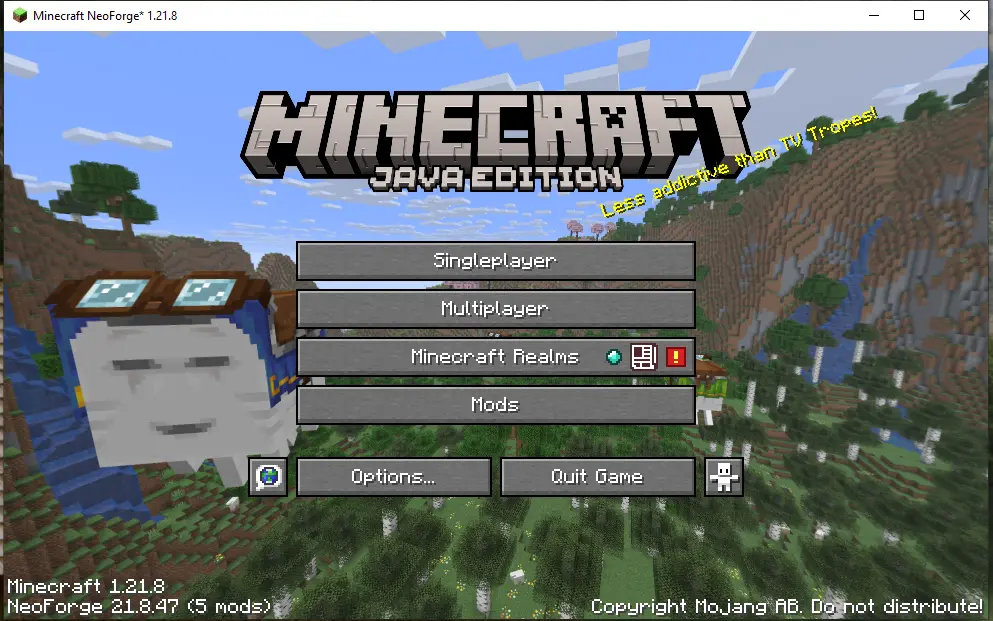
Congratulations! You have successfully installed NeoForge and your first mod. The process for other mods is identical – just download their .jar files and place them in the mods folder.

Downloads & Links
- NeoForge Official — Official website of the NeoForge project.
- Sodium on Modrinth — Download the Sodium mod for NeoForge.